Pages

Showing posts with label thrifty. Show all posts

Friday, April 9, 2021

A Jug of Winecups, A Loaf of Bread, and Thou


I love the lyric poem known as The Rubaiyat of Omar Khayyam, by the poet-astronomer of Persia. Edward Fitzgerald translated the most popular English version in 1859. I don't know how close it is to the original Persian thoughts, but his version is exceptionally beautiful. My title is a weak play on words; in one line of the poem (over 1,000 lines long!), the poet states, "A jug of wine, a loaf of bread, and thou" to his love -- all that he needs.

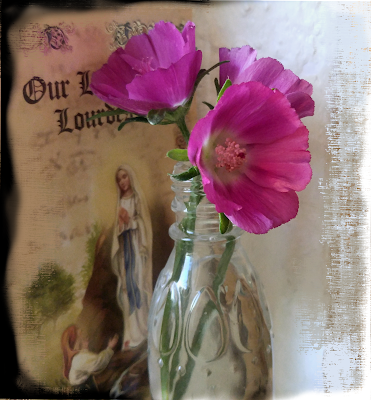
Not only are my winecups blooming, but I bought another small pot of them and have them planted in my new fire-ring in the courtyard! Winecups are native perennials, very low-growing, but with the blooms held on wiry stems well above the dark, deeply lobed leaves. 

winecup wine cups perennials


The hollyhock roots are planted, too. And the new lemongrass! I skulked through all the pots (do you do this, too?) until I found two that each had two plants growing, instead of just a single plant. Chuckling to myself (yes, I'm THAT crazy lady you see at the plant nursery), I put them into the cardboard tray along with the hollyhock packages.


Grrr, the local nursery is a very lightweight nursery, not like the old one, back in the old days, before I was old. The old one -- gee, it was only 30 years ago -- had it ALL. This one, no. I asked if they had Dutchman's Breeches. I want to be able to point to them in my courtyard and casually ask, "Do these Dutchman's Breeches make my butt look fat?" FOILED AGAIN.

Now, when you go to the garden center, use my other trick, too. Always heft the packs of roots or bulbs that are opaque. The packages are opaque so that light doesn't prematurely trigger the plants to grow, but it prevents being able to see the size of the roots, bulbs, or tubers. So, go by weight. You want the heaviest ones! 

And speaking of that...'ear ye, 'ear ye...in the grocery store, choose your corn and your artichokes that way. BY THE HEFT. Get the heaviest ones. I guarantee, you will never be disappointed in the ears of corn again.

Now, add an extra step for the artichokes. Put it next to your ear, and give it a squeeze. It must squeak. No, I am not pulling your leg. Make sure it squeaks. Squeak = fresh. Get the heaviest, squeakiest ones. You are most welcome.

"Class, what are some facts we have learned from today's post?" 

"Olde Dame Holly, we have learned about choosing double-planted pots, and heavy corn-on-the-cob, and heavy squeaking artichokes. And we have been reminded about The Rubaiyat of Omar Khayyam. And we have learned you're a little crazy, but we knew that, really."

Class dismissed! And as always, thank'ee for stopping by.

Kind regards,

Olde Dame Holly

Monday, February 22, 2021

Free Easter Images and Free Thoughts

Warning about free stuff: As the old saying goes, "Free, and worth every penny."

One week ago, the U.S. was gripped by three winter storms in a row. Even here in the desert Southwest, we had snow, graupel, and several days where the high temp was below freezing. My heart goes out to those who were severely affected; two animal rescuers in Texas I know are still in bad shape, and only their lion-hearts are keeping their rescues afloat as they scamble for water and warmth for the animals in their care. 

But what a contrast, here: We have sun, spring-like temperatures, and flowers beginning to bud. I noticed that a winecup plant that last week was ice-encrusted, has today put up two big flower buds. I bought the tiniest size of the winecup at the nursery last year, a weak-looking plant with four leaves, and today it takes up half a fire-ring (fire rings are like stock tanks, but no bottoms). The winecup is in a struggle with an ice-plant as to who will dominate that particular bit of garden. My heart is with the winecup, so I give it a bit of help with judicious pulling and re-homing of the ice-plant. Do not grieve for the ice-plant! It easily roots wherever I place it.

I am greedy for flowers in my yard; flowers and wild grapes. I was able to snag a plot in our community gardens here in the city today, and that's where I will grow vegetables this year. That leaves all of my fire rings here at the house free for flowering plants. The "plot" of land I am assigned has had some improvements made, including PVC pipes arched over the top and secured at the sides of the raised bed. That is going to come in handy for "shade cloth," which helps shield the veggies from the full strength of the sun. Even full-sun plants here do better with some shade. I have the water faucet at the end of my plot, too, so that's a bonus. 

Here are some shabby tags for Easter. Maybe you will find a use for them: Glue them to a can or bottle, tie onto a cabinet pull, place with some greenery. As always, since mean ol' Google compresses files and makes them smaller, use this LINK <--- right here and download the original big size from Google Drive. Don't save the image, as it will print too small or be too fuzzy since it was reduced in size.

But...to get a better view of them, you can right-click them, choose open in another tab or window, then regular-click and use the little magnifying glass to see them better. Sometimes it's hard to make the little magnifying glass appear.

And as always...thank'ee for stopping by.

free shabby prim easter tags rabbits bunny parade
Kind regards,

The Merry Olde Dame, Holly

Tuesday, February 2, 2021

DIY Vintage-Style Ceramic Jar Knobs, and...CANDLEMAS

It is Candlemas! Groundhog Day and Candlemas fall on the same day. Today we had a blessing of candles at church. Before Mass, there was a sudden rustling of bags and parishioners flooded to the front to place them before the altar, but respectfully to the side a bit. Then the priest, warning that few churches do this anymore, blessed them. He ran through a quick list of many "-mas" events, with Christmas being the best known, of course. He mentioned Candlemas, Michaelmas, Martinmas, and Lammas. I had not heard of Lammas and am going to research it. 

I found a mislabeled box today that I had not opened since our move of over a year ago. I opened it up, and there were several items inside that I had been missing. Not the vintage Pyrex I'm missing -- boo! -- but some other cute things.

What I'd like to know is why it didn't bother me, and why I didn't notice, a rather large cardboard box sitting against the wall of the den for over a year. The cats like to sleep on it. So there was the raggedy box, with a ginger cat (both are gingers), always a-snooze atop it. 

But inside was this little Mason jar lid with a ceramic knob added.


DIY mason fruit ball jar lid with knob


When the knobs at Hobby Lobby are half off, I often pick up a few. They reside in the "junk drawer" until needed. I seem to use up a lot of them. In fact, I have none left.

Do you see that feather in the photos? I'm pretty sure that's an owl feather.


do it yourself mason fruit jelly ball jar with ceramic knob lid

To add a knob to a metal jar lid, you can drill a hole in the top of the lid just slightly larger than the diameter of the screw portion of the knob. Obviously, the lid will no longer be airtight, but it's not meant to be. It's more for storage of non-edibles or a little "terrarium-style" decor item. If you do not have a drill, or a hand-drill, then you can use a biggish nail and turn the lid upside down (so you don't dent it), and carefully tap a hole.

The problem with most decorative knobs is the length of the screw that sticks out. You're going to have to cut it shorter, with a hacksaw. I sometimes just wrap a rag on a loose blade and use it, but that's naughty.

BEFORE you cut the screw shorter (way shorter), you need to thread a nut on it. They come with a nut on them, usually, and sometimes two, and sometimes they also come with a washer. Anyway, this is important: THREAD the nut on it, snug it up, and cut BELOW the nut. Then, when you work the nut off, it will rethread the threads that were damaged when you cut them off with the hacksaw. That way you can then get the nut off and on easily, which is important because you will need to be able to thread that nut back on there and snug it up once you stick the screw end of the knob through the hole in the lid.

My explanation is way too wordy, but as you actually do this project, it will all be obvious.

So you will end up placing the knob's end (the shortened screw part) through the hole you made in the lid. Then add the washer if you want, and definitely add the nut. Tighten up that nut but don't be too rough. Now you can put the lid on a jar. 

The workaround for those of us who don't have a drill or just don't want to deal with punching through metal is to get one of those metal lids that already has a hole for a straw. You will DEFINITELY need to add a sizeable washer with a small hole under the lid if you plan on using one of these lids, so that the knob is held securely and doesn't wobble.

Do you remember that song by Barbara Mandrell? "I Was Country, When Country Wasn't Cool." Well, I was a canning jar fanatic before they were popular. They can be "out" now for all I care, but I will always love them and decorate with them!

    Kind regards,

    Holly, The Merry Olde Dame

Tuesday, January 12, 2021

Washing Tinfoil, Using Margarine Tubs as "Tupperware," and Sewing Pretty Cardboard

I still do many of the make-do type of things my grandmother did. If "tinfoil," which I guess we now know as aluminum foil, is not very soiled after use -- for example, if it was just used to shield some baked squash from getting too brown -- I wash it and put it into the warm oven to finish drying. 

If you peek in my fridge, you'll think I eat an awful lot of margarine and am afraid of running out. There are little tubs of "I Can't Believe It's Not Butter" sitting on every shelf. The real tub of margarine is always kept in the little butter area on the door! Everything else is holding bacon grease, leftover black olives, baby carrots floating in chicken broth (for the plump doggies to snack on) and so on. 

diy vintage cardboard valentine's valentines hearts make-do thrifty

Maybe this was common in the 1960s only where I grew up, but we had wallets, coasters, collapsing coin holders, and recipe-holders sewn from pretty cardboard. Many department stores placed blouses, shirts, and so forth in lightweight cardboard boxes, usually printed with the store name or initials. Others had fancier boxes with all-over patterns, and the five-and-dime had stationery boxes that were just divine. I remember some gorgeous shoe-boxes as well, back when all shoes were expensive. 

diy coral blue cardboard hearts for garland

My grandmother would desconstruct the printed cardboard boxes and cut out pieces for useful items, then sew them. Many times, she would sew through a double-thickness of cardboard, with two different patterns, so that the item was "lined." But for some items, it was just a single thickness with the pretty side of the cardboard "out." Sometimes she'd rub beeswax onto the cardboard to "seal" it and make it more durable. Sometimes she used crochet to connect the pieces. Until it fell to dust, I had a sweet basket she had crocheted from the fronts of Christmas cards.

diy depression era make do cardboard hearts sewn

In keeping with that tradition, I have been making both flat and stuffed hearts to make into a garland for the wall. I used part of a lovely old cardboard gift bag that a friend from India gave me years ago. Coral and blue aren't the usual Valentine colors, but they go very well with my Southwest home, and in my stash of collage materials I had paper flowers in all the right hues. Most of all, I just love make-do's. My mind is so happy and engaged, full of memories of my grandmother, when I'm doing the same handiwork she did so long ago. 

I wonder if anyone else has unusual and extremely thrifty little ways that were handed down to them or that they discovered?