Pages

Showing posts with label crafts. Show all posts

Monday, October 4, 2021

A Little Free Paper Craft and Some Pecan Lore

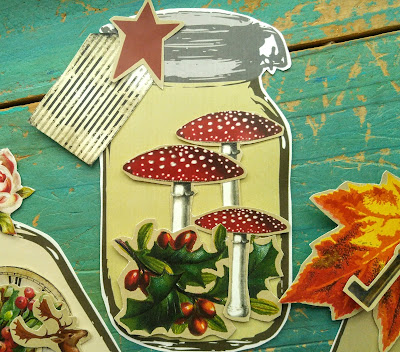
Since I'm in-between employment, I've been making a lot of digital tags for my Etsy shop. I decided to print out my new favorites and make some cute "Mason Jar" decorations. I drink out of canning jars of all shapes and sizes and use them for storing foods and small items. And they make such cute rustic vases!

MerryNeedle on Etsy - Mason Jar Digital Tags
 
It was wonderful to sit on the bed with the dogs and cut out my "scraps" while a sweet OLD Hallmark movie played! Oh yes, the movies are silly and syrupy, but I find them to be a nice background to crafting! Halloween, Thanksgiving, or Christmas, it doesn't matter. I like to link the entire end of the year together and enjoy all of it, zusammen! But the NEW Hallmarks are not to my taste at all! They seem kind of trashy!
 

I have a link to a special set of these silly little tags just for my bloggie readers! It's at the bottom of the post. The ones for bloggie frens are not in the Etsy shoppe, but are just for you to enjoy, if fussy-cutting and glueing is fun for you!  

I went "running" with my buddy, my dear hubby. I gathered some rare jujubes, which are tasty but are mostly a big seed. They are falling off like a rain of dried plums! I don't know if they are visible, but like most things in the desert, the branches have HUGE thorns.
 

Then it was time to go check if the pecan groves have begun to change leaf colors. It's still too early.
 
 
The pecans are still ripening, still in their husks. I gathered several fallen pecans still in the husk (they are no good for eating if they fall when unripe), because they are a surefire cure for ringworm! 
 
 
Sometimes I take in litters of kittens that need bottle-feeding, and many times, these poor things have ringworm. There are pharmaceuticals to combat ringworm, but I feel the green husk juice is more effective. It does stain the skin and fur, but the quickness of the cure is worth it. It eventually fades, usually before the kittens are ready for their "furever homes." I have the green pecans I picked up stored in the freezer for future use.
 
I have heard that green pecan leaves are also effective, but I haven't tried that. 

Did you know that it's LUCKY if a pecan "beans" you right on the noggin? It is!
 

There was a roadside shrine among the trees. These are common here, and are called descansos. They are protected by law when placed along a public highway or roadway, and many are very elaborate. They are placed at the sites of fatal accidents. I try to drive very carefully, and the descansos remind me of how important it is to continue to do so.


I'm just about to start a fun crafting project where I take a Dollar Tree hanging "witch" and hopefully elevate its appearance somewhat! I hope to pop in later this week with a "before" and "after" post. I like the Norwegian "kitchen witches" and hope this will bring those funny witches to mind. I do not like "scary" things, but I do love kitschy funny ones!

I hope you are all doing well this first full week of October, bloggie friends! Anything special planned this week?


Kind regards,

Holly, the Olde Dame
 
USE THE LINKS or they won't print correctly!


Link to the "Autumn" Jars:

AUTUMN JARS

Link to the "Winter" Jars:

WINTER JARS

Monday, May 3, 2021

Lavender Wands, Dilly Dilly

lavender wands


"Lavender's blue, dilly dilly
Lavender's green.
When I am king, dilly dilly
You shall be queen."

Once upon a time I had an ample supply of blooming lavender, and a wonderful co-worker showed me how to make lavender wands. This was, oh, perhaps 40 years ago now? 

Alas and alack, I have a very limited supply of blooms this year. Between three small two-year-old bushes, I had enough blooms for three wands.

It's easy to make them, and it's a bit of lore I'd love to pass on.

All it takes is the fresh lavender cut with as long a stem as you can manage (it can have little leaves and side-buds on it); 1/8" satin ribbon or similar narrow ribbon of your choice for a small wand, and wider ribbon if you are lucky enough to make a big wand; and a toothpick to help you move the ribbon among the stems evenly.

Skip down to read about how to make wands! 

But first, some garden news! (1) The Egyptian Walking Onions at the community garden are making "pups" and I have planted some at home. WILL THEY MAKE IT? (2) The lemongrass in my courtyard seems a lost cause. It is not visible any longer! The doggies have eaten it all. I always call one of my dogs "my little curly lamb," and indeed she is like a sheep, chewing grass. The chiweenie was in on it, too. They split up the lemongrass between them: He ate all of it at ground level, and she climbed into the raised beds and ate the rest! (3) The Sweet Meat squash is up and looks like it might make it. 


Back to our wands:

Gently remove any side leaves or side-buds. Work with fresh lavender. The type doesn't matter. If needed, put the cut lavender in water in a vase in the fridge, like the florist does.

ribbon and lavender for lavender wands


I could not put my hands on my plastic canvas sewing "needle," made of plastic with a huge eye for yarn. But that might make the weaving so very much easier.

There are many tutorials on the web on how to make these wands, but many of them are bunk. Why do I say that? They don't share the most basic part of making the wands: YOU MUST HAVE AN ODD NUMBER OF STEMS. The simple over-under weave will not work with an even number of stems. You are going in a spiral pattern, a basketweave, and thus an odd number is a must.

But the other tutorials have nicer photos. I was doing this, oh, around 3:12 a.m. I had intended to do it in the morning, but I had already picked the stems and taken a photo of them with the ribbon,then put them in the fridge. Since I have terrible trouble sleeping more than an hour at a time without having to get up, it seemed like a good idea to get up and make wands at that hour, but it didn't lend itself to clear thinking or clear photos.

Gather as many stems as you want together, with the HEADS of the lavender together. Make sure to have an odd number. Tie a piece of ribbon right under the heads. Don't make the knot too tight. Don't cut into the stems. 

how to make a lavender wand


I just use one piece of ribbon, so I make sure the knot has a tail that extends down several inches. I'm going to tuck that tail in the middle and let it just hang, and let it be covered by the weaving of the other end of the ribbon, and then once I am done weaving and wrapping the unwoven stems about a half-inch to an inch, I use that bit of tail between the stems to tie off the weaving ribbon, and cut the excess from both tails.

The other way is to just make a nice knot and cut, then tuck in the end of another piece from the ends of the stems and coming out from the top of the "cage" described below. 

Making the cage: Once you have the knot in place under the heads of the lavender, you carefully pull up each stem to make a "cage" around the heads. At this point, just pull them gently, one at a time, up and over the flowerheads. You will use the toothpick or your fingers to arrange the stems as evenly as you can. Now turn it over. You are holding the stems and the caged flower heads are at the top. 

lavender wand DIY


Some people with a LOT of lavender make wands that are practically CLUBS. I envy them! If you want to make a huge one, limit your weaving to just the outer stems.

To figure out how much ribbon you will need to cut to do the weaving, I put my fingers together, like two fingers for a small wand (I have tiny fingers), and wrap the ribbon round and round in a downward spiral until it's as long as the caged flower heads. Then I add about two inches. CUT. 

If you are using the one-ribbon method, the other end is still inside the cage, part of the knot that is under the flower heads. Come up under a stem, pull the excess ribbon through, and go over the next stem. Then under the next, over the next, under the next, again and again until you have covered the entire head. Don't overthink it.

This is the part that is difficult. The first few turns are hard to do, and the basketweave isn't very visible yet. You are working from the TOP down.

lavender want showing the "cage"


Use your toothpick to push up and tighten the ribbon as needed. It might be like lacing up a shoe. You pull up some excess, and kind of sequentially pull the slack up between each stem, all the way down. Then wrap the stems without doing any over-and-under once you are past the "caged" part. Pull out that tail and tie an overhand knot with the weaving end of the ribbon.

basketweave lavender wands


Make sure the weaving is pretty tight, because the flowers will shrink as they dry. My darker wands came out much better than the first pale ribbon one I did. The blue ribbon above needs to be pulled and the slack taken out before continuing.

To refresh the scent, just squeeze gently on the woven end of the wand.


I hope everyone had a good weekend and is having a good Monday!


Friday, February 12, 2021

The Golden Age of Blogging...Arising Again?

Cloudy days are rare here, and they usually place me into an introspective mood. I was thinking about blogging, how it was in the early days, how there seems (I hope) to be a resurgence, and then more thinking about Facebook versus blogging. I'll save that last thought for another post.

One of the fun things in the early days of blogs was the giveaways. They added so much excitement to the community. During the time blogs were really hoppin', there were giveaways in abundance. Sometimes they were held to encourage commenting, and sometimes just to reward faithful readers, and sometimes just  because the blogger was so generous-natured. 

I am noticing that on Facebook, in some of the groups, there are giveaways happening. I think the "Groups" are following along a track similar to what happened in blogs, but I will boast here that I do not think Groups will ever equal the true community of blogging. 

I was happy to see a giveaway on a BLOG the other day! It made me smile, thinking of the heyday and how fun those times were, and how strongly blogging is rebounding.

I like to comment on blogs (one childhood nickname was "Loud Mouth Lime" due to my spouting off constantly) - just to add in my little bit of knowledge, chit-chat, or support. But a comment left did enter me into a giveaway, and I won, over at Acorn Hollow! What a wonderful bounty: Hooked pillow that is an absolute heirloom, hooked heart box with delicious chocolates (even shared with hubby), let me add here all wrapped so beautifully, fuzzy socks I put on immediately, and fussy-cut vintage Valentines. As someone obssesed with paper items, I can't tell you what a thrill the Valentines gave me! It is all so lovely.

Just take a look:


Lovely Valentine's red wrapping


BUNNY ALERT: An heirloom of my house now, in pride of place on the mantel


Two of the dear Valentines
Thank you, Cathy, of Acorn Hollow! Charming name for a very charming blog! If you admire hooked rugs and love sweet blogs like I do, please visit Acorn Hollow. Her work is beautiful, and just wait until you see her new workroom devoted to her rugs. 

It truly is delightful, for me, to follow the blogs I do, and read and see their posts. Some may think that their days or their gardens or their thoughts or crafts aren't "interesting" enough for a blog or worthy of a post, but I assure you, I read them with great interest and learn many things, am reminded of many things (my mind will go a mile a minute on the memories I recall), and take joy in the "small things" written about, photographed, and shared. And I am hardly alone! There is a whole army of us out there, who really enjoy the special sharing done on blogs. And once again, our ranks are growing!


Tuesday, February 9, 2021

Simple Decor for Easter, and Fabric-Wrapped Eggs

This year I am keeping Easter very spare, in terms of decorating. I am not buying anything new, and I will not put out very much of my existing decorations. In fact, I have a box of pretty decorations that are going to the thrift store that supports one of the main animal rescues here. I did the same with Valentine's day decor, a few weeks ago. Sometimes I get a "pang" when parting with something. But honestly, after I give things away, I often cannot quite recall them later. 

chocolate bunny hiding behind an antique mexican crockery


I did take a few plastic eggs and glue some strips of black-and-tan checked homespun onto them, while watching the Weather Channel's coverage of Winter Storm Roland, and their predictions about Winter Storm Shirley. Valentine's Day is giving the U.S. a very cold shoulder this year. 

homespun check checked easter eggs fabric covered


The eggs are easy to do. I have seen eggs finished much more neatly for sale, but I don't mind my less-perfect creations. I tried two different ways I found on the internet, and I like the way that uses strips best, not the way that wraps the egg and just has some slits to overlap. Aleene's Fast Grab Glue worked very well on these. The egg underneath is one of a dozen "chalkboard" finish eggs that I got last year at Walmart, for just pennies after Easter. 

I mix my primitive items with sparkly ones, new ones, vintage mid-century, whatever. I like a mix. Some are purists, and that is fine, too! I put several nests and eggs in a big tin "tart" on a pedestal, and that is by my front door, at a window that looks directly at the courtyard. 

pastel sparkly easter eggs in nest


the merry needle themerryneedle easter decorations in tin tart

I know how to make Ukrainian eggs, known as "pysanky." I don't know if I will make any this year. I would need to order new dyes. A very kind Ukrainian mathematician taught me how to make them, and gave me a "kistka," the tool that draws wax onto the eggshell, decades ago now. I have so many little projects going that I am not able to get to them all! But with these winter storms coming, it might be best to have some distractions on hand. I think there might be quite a few power outages and certainly it is going to be hard to get around in many areas. Do you have enough yarn, fabric, paint, and trim to tide you over the coming winter storms?


Sunday, January 31, 2021

DIY Beaded Easter Egg, Some Pretty Roses, and Free Printable Valentine's Tags


From The Merry Olde Dame's Almanac:

Forecast for February 1 - 7, 2021: Wishes for a peaceful week ahead, with scattered bursts of laughter and sprinkles of delight, followed by strong gusts of good fortune and contentment.

red and pink fresh roses www.themerryneedle.com


The roses above are from a birthday bouquet. After admiring them, I drove from church to church in our parish and laid a bloom at the feet of each statue of my Queen of Heaven. What a delightful drive!

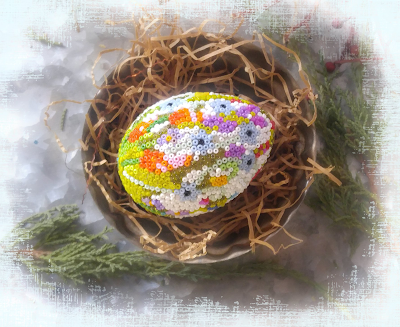
I am mingling Valentine's decor with Easter decor now...I made this egg by simply glueing on, with a "fast-grab" white glue, seeds beads onto a papier mache egg. I do a small section at a time, placing some glue down, picking up one bead at a time with a toothpick (I blunt the end) that was dipped in glue or beeswax. While the glue is wet, you can slide the beads around a bit and get them into position with the toothpick's other end.

diy huichol style beaded seed bead egg Easter craft


It is therapeutic, methodical work, but very easy, so that it can be done while listening to music, podcasts, or television. I am going to try to depict a pansy next. I love their little whisker-faced blooms! I planted their little cousins, Johnny Jump-ups, earlier. Just scattered the seeds and am hoping they will come up.

Here are some free printable tags featuring the wonderful artists of yesteryear. They might be cute for decorating. As usual, use this Google Drive LINK <--- for this large file, so that it isn't compressed and so it will print out the right size.

Anyone else decorating or crafting this week? 

diy free printable Valentine's valentines tags digital

Friday, January 22, 2021

A Little Love Banner Free Printable

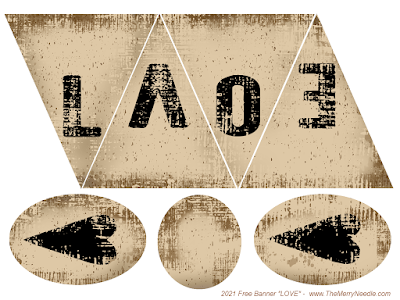
Here is a thrifty one-sheet banner to print that spells out "LOVE." Might be cute printed out, maybe grubbed on the edges, or sweetened with mica or metallic ink, and tacked on a shelf edge or across the top of an armoire. 

I had the pink version up on my old blog, and have added a tan and black raggedy version.

Use the links to make sure you get the full, uncompressed file, stored in the Google cloud. 

I'm still working on my Strawberry Bunny cross stitch designs. I've got the second one nearly stitched. Where I slow down is translating the actual stitchery to chart form. I dread that part! I like the stitching part best. Of course, I remember when charts were made using graph paper and an old Underwood typewriter!

We had our first foggy day of the year today. It's a rare event and was very exciting to those who have lived hereabouts their whole lives.

Pink Link

Tan Link

diy cardstock banner valentines free freebie printable digital

free printable valentines love banner diy


Thank'ee for stopping by.

    Kind regards,

    Holly, The Merry Olde Dame

Monday, January 18, 2021

Finished Wall Garland from Cardboard Scrap for Valentine's Day

I finished my little cardboard hearts garland (blog post HERE about sewing cardboard hearts). It is very quick to do. I deconstructed some inexpensive trim from Hobby Lobby and used the flat ribbon part of the trim to glue the hearts on, and the frizzled threads to further embellish the hearts. It's very quick if you use hot glue. I always have my trusty magnifying glass (second picture) nearby. I can't remember if it came from Hobby Lobby, too, or Michaels, or Tuesday Morning. It is metal with chippy, creamy paint, prim-looking.

DIY cardboard paper hearts wall garland with trim

magnifying glass paper valentines hearts garland hanging


Glue the hearts along the ribbon or string by using two points on the back of each heart, near the top but just slightly below the notch of the heart. That way, the ribbon or string will not show between the upper humps of each heart, but will still lie nicely against the wall.

do it yourself inexpensive Valentine's valentines heart garland hanging

I use map pins on my walls, each painted with a bit of acrylic paint to exactly match the wall colors. That way, they almost disappear when viewed.

paper cardboard scrap hearts easy wall garland

Inspiration and time finally coalesced and I am busy cross-stitching a little series of what I call "Strawberry Bunnies." Sometimes, I have to give myself permission to create without worrying about what others will think of my ideas! Tomorrow I'll post a sneak peek of the first chart as it's being stitched. It is such a lift to be cross stitching again. I can barely wait until "stitchin' time" each evening after the chores are done.

    Kind regards,

    Holly, The Merry Olde Dame

Friday, January 8, 2021

Computer Goes Kaput, And Portable Sachet Making

It started with a funny little noise, a noise of the disk whirring when there was no reason for it. Then the whirring added a tick-tick-tick sound, and the screen would freeze, and a disk error would pop up and require the computer to go through lengthy "checks" which always ended with the funny noise and the tick-tick-tick sound.

And then, the computer was no more...at least for now.

Luckily, I have an external hard drive I keep updated. But it is very difficult for me to do techie tasks and set up a new computer (as in "new old" computer). I had on hand three of the same kind of all-in-one computer that were the choice of a school where I taught a few years ago. I saw the abuse and bumbling the machines withstood, and got these three when another school district upgraded. Unfortunately, of the three, the one I was using is no more, but this "new" one might, just might, also last a couple of years. The other one is set up for my husband. For $50 each, I am happy with them. I have spent 10 times that on fancy computers that didn't last three years, and I'm not doing that anymore! I don't mind being behind the times computer-wise.

But it is working well enough! So now I get the treat of going to various blogs and seeing all the news and musings!

My husband had his first cataract surgery three days ago (on his birthday, no less). He really didn't want to do it, but now he is extremely pleased. I feel it will help him be more involved in life. He was getting very shut down...While waiting at various doctors' offices and the surgery center, I had plenty of time to do some stitching. 

diy easy heart lavender sachet cloth

easy do it yourself cloth velvet sachet for Valentines's day

Valentine's Day lavender sachets from velvet ribbon inexpensive

cute quick diy sewn sachets

sachets sewn and easy to make


I also made two little hand-quilted coasters out of cotton fabric scraps and cotton batting (shown under the sachets), and another scrap bag heart sachet, this one with beading. Then I started on some little sachets made from velvet ribbon. I just cut a length of ribbon, remove the wiring, fold and stitch. I'm stuffing them with lavender. I use culinary lavender, both to make sure it has no nasty chemicals and because I've noticed the culinary lavender seems stronger.

I like to chew a bit of it to keep my breath fresh. I use clove and fennel the same way.

Hoping everyone had a good week (and a non-kaput computer).

    Kind regards,

    The Merry Olde Dame, Holly

Tuesday, January 5, 2021

Handsewn Scrapbag Heart

I can't face a house with no decorations when the Christmas decorations come down. It looks too empty and lonely, but I don't like to go full-Valentines too soon, either. So I go with what I call "early Winter" decor, which is natural and pastel tones on hearts and sachets mixed with cold-blooming florals like snowdrops. I also have some solar-powered "fairy lights" in jars (see end of post) I sit around the house. I was surprised that my husband is very fond of the jar I put where he can see it at night. He says it cheers him to see it if he awakens.

themerryneedle.com simple sewn hearts from scraps

do it yourself small sewn hearts from scraps and trim

diy simple sweet scrap bag hearts


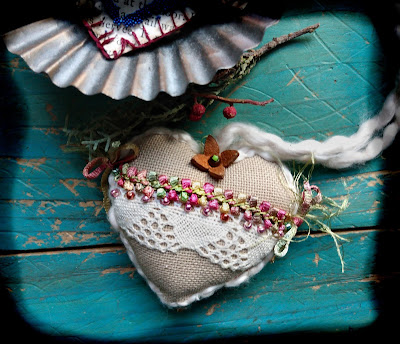
I like these scrap-bag hearts because they give me a chance to paw through my little snippets of materials and strange little bits of trim, beads, and trinkets. I find things I had forgotten completely!

These are very quick to stitch and they don't take much stuffing or lavender to fill out nicely. If you back them with a calico or with Valentines colors, you can flip them over and get double-duty from them. Use any small heart shape for a template. I think the naive style makes them so enjoyable to create. Wobbles and wiggles just add to the simple charm.

One of the solar-powered fairy jars: 

solar fairy lights in an old canning jar mason bell jar


Thank'ee for stopping by.

    Kind regards,

    The Merry Olde Dame, Holly

Friday, January 1, 2021

2021: A Blogging Renaissance

blogging revival and renaissance 2021


I don't know about others, but I have been hoping for a resurgence of blogging and the blog world. I blogged during The Golden Age of blogging, way back in 2004 until the Rise of Facebook and the later platforms such as Instagram. 

I followed many interesting blogs, and attempted to follow my favorite "original" bloggers as they transferred their attention to Facebook and abandoned their blogs. It was a bittersweet experience; of the former bloggers I "kept up with" on Facebook, only two people seemed to post anything authentic. One of them, luckily, also generously keeps up her blog. And some of my favorite blogs morphed into commercial ventures so heavy with ads that I couldn't find the posts sometimes, and some former favorite bloggers began posting nothing but memes and sales (with no real content, ever). 

I fared a bit better with Facebook "groups." But I have seen so much bullying, and so much of it seems to be "Look at this, but look quickly, because this is going to disappear into oblivion very quickly" due to the speed of "feeds." Hundreds of posts and thousands of comments in the space of a day is too rapid and too shallow for me.

Now, I'm not judging. No one owes me anything, least of all heartfelt posts, interesting information, a slower pace, or real glimpses into their real lives. But I missed it.

When I decided to begin blogging again, I encountered a bit of pushback from some of the people I know. It was as if I had declared I wanted to go back in time or go join some Luddite commune. One person told me, "Blogging isn't even a thing anymore." I got warned not to mention blogging during any job interviews (ageism and COVID ate my job): "It makes you seem old." Well, I am old. So what? 

I think blogging is indeed a "thing," an important thing. A chance to share, to capture moments in time, to build a community, to keep crafting alive, to serve the idea of inclusion in a fragmented world, and to offer encouragement. It doesn't have to be any of those things, but it can be. And it can also just be anything a blogger wants it to be.

I didn't get (or need) gifts this Christmas. But I gave myself a gift -- permission to enjoy and value blogs, to take the time for old-timey hopping from blog to blog, and I'm already discovering little gems of beauty or humor or knowledge that brighten my days. In The Time of COVID, I think blogging is MORE important than ever! 

May 2021 prove to be a revival of blogs and blogging. The world is brighter because of simple blogs!


Saturday, December 12, 2020

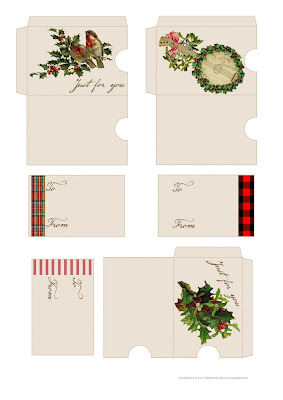
Gift Card Sleeves: Free Printable Holders for DIY Christmas

Last week was surgery week for me. Five surgeries, even short outpatient ones, in a row is draining! I feel like a very sore pincushion and look like one, too. Black and blue from stem to stern! After the third day, I got a bit lost. I'm not sure what happened to Thursday and Friday. I just know that now, instead of rest and magazines and pampering and daytime television, patients sit up in recovery, begin walking around, and keep up a schedule of walking every hour. It's evidently a lot better for us than the old way.

If you forgo sedation, you can even drive yourself home, to the pharmacy, etc. after just an hour's wait.

One thing I did notice in my few travels last week (to the grocery and the pharmacy) was that people were shopping like crazy. With stores just reopened this week in New Mexico, the shelves are being picked clean. We don't know if they'll be shut again before Christmas, so everything and anything is being bought. There are only a very few giftcards left, too, out of hundreds and hundreds per store. And for some reason, none of the little free holders are left. There are some rather pricey ones for sale, but that's not thrifty if you're on a budget. I love the fancy holders, but not the cost.

Here are two sheets of do-it-yourself printable holders for gift cards. You could also tuck cash into them. 

You can print them out at home or send them electronically to an Office Depot, Walgreens, or Walmart; in most towns they print them right there. Then you can cut out, fold in half, fold the tabs, glue, and the gift card holder is ready once dry. With the fancy dry-line adhesives, you don't even have to wait for them to dry.

The extra little card can be used or just discarded.

Use the LINKS to make sure you get the full-sized file stored "in the Google cloud." Blogger compresses and shrinks files and then they don't print as nicely. Better to use the "cloud" or "drive" and get the best file.

Use THIS LINK <----- for the old-fashioned holders.

free printable christmas gift card holders sleeves diy


Use THIS LINK<-------for the red/blue holders below.

diy christmas printable digital gift card holders sleeves


Thank'ee for stopping by.

    Kind regards,

    Holly, The Merry Olde Dame


Friday, November 27, 2020

Overdying Floss with Coffee

I did a little experiment a bit ago. I had a bargain bag of variegated floss from J&P Coates. When I bought the bag, I thought it had a large variety of floss, but it turned out just to be triples of each color. I like bright colors in some moods for some stitcheries, and muted colors for other stitcheries, so I decided to overdye a set of flosses.

I just used regular ground coffee, and a low-tech drip pot. I made it pretty strong, and I pushed the floss into the hot coffee, stirred it now and again, and then took it out after about three hours. In retrospect, it was not long enough. It looked like a good, deep overdye, but when I rinsed the floss after letting it dry and "set," a lot of the coffee color washed out, too. So the effect is very subtle.


In the photographs, it's hard to see the difference between the overdyed floss and the regular floss (paper bands still on). In real life, the difference is more obvious.

Some needleworkers are adamant to never use tea or coffee for overdying, but I look at it a bit differently: I have seen samplers and stitcheries that are 200 years old, and they are intact, despite how the people of the day prepared the dyes and even the floss itself. They aren't disentegrated despite a lot of hoo-haw over acidic content or tannins. But everyone has the right to their own opinion. Some of the little things I stitch, like a simple pinkeep/pincushion, don't need to be preserved for the next 500 years. An elaborate stitchery, perhaps yes.

I might try walnut dye in the future, but I hear it gives a gray tone, not a brown tone. I go back and forth on whether I like muted yellow-browns, or muted cool grays.

I think I'm going to stitch up a Valentine's pinkeep and then overdye the entire thing. Perhaps. I like the look of the muted tones on a very clear pastel fabric, or clear tones on muted fabric. I'm not sure about both floss and fabric being muted. 

Do you like the look of muted floss in a stitching project?

    Kind regards,

    The Merry Olde Dame

Monday, November 23, 2020

Tag Fest During Lockdown

Our state (New Mexico) continues its lockdown, and most stores are closed. There's at least an hour-long wait to get into a grocery store or a Walmart, due to a rush on items, to both a Walmart and an Albertson's Grocery being shut because of COVID-positive staff, and to our location near the border and El Paso. 

Strangely, I was able to upload image files from home and have "contactless" delivery of the printed out tags from our Office Depot store. Hooray! 

printable digital tag sets from the merry olde dame on etsy, shown on a bed


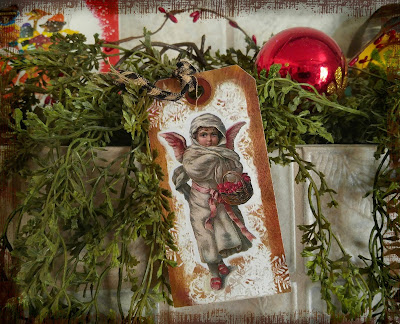
So today I have been "fussy-cutting" the tags and now I'm ready to add the twine or ribbon to hang them, and to add extra decorations to some of them (such as fake snow or glitter). I have one up on the mantel already from a White Christmas set, and tomorrow or even maybe later tonight (I am awake during the night, unfortunately) I'll put the rest of that set up.

white christmas tag set on etsy by the merry olde dame


I found some nice "homespun" black and cream checked fabric at Hobby Lobby a few months back, and that's what I'm using to hang them. I just tear strips of the material and poke it through the hole I punched.

My poor doggie "Champ" was bitten/stung on his rear by SOMETHING. I'm guessing it was either a giant centepide or a scorpion. Ugh! He's "disabled," in that he was a victim of abuse that left him with a ruined back left leg before he was rescued, but he never lets that stop him. He's a mighty hunter, constantly hopping around the backyard and chasing anything he can. He's all heart, being a Chiweenie, and even confronts snakes, hoot owls, and once, a coatamundi. Our yard is walled, but somehow creatures find their way in, right in the city. Anyway, he saw the vet and he's predicted to be able to mend quickly. He's my little cuddlebug shadow; his "sister," a Bichon mix, is loving but much more reserved. 

I hope this Monday finds you well and happily occupied! If your state is in lockdown, or you are avoiding going out, what have you been doing lately to stay engaged and content?